TL;DR; GraphQL subscriptions can be tedious to implement but are worth setting up early in your application development. Making your app reactive is key to providing good user experiences and ensuring scalability. In this write up we show you step by step how to setup GraphQL subscriptions for websockets via Pusher.
In the last episode we covered how to define reusable mutations for standard resources using graphql-ruby, making it quite straightforward to define resource operations (create/update/delete).
In previous episodes we covered how to setup, define and query GraphQL resources (Ep. 1) and then how to define reusable mutations for resources (Ep. 2) using graphql-ruby.
In this episode we will show you how to leverage GraphQL Subscriptions to make your frontend application reactive, by receiving object updates via websocket (Pusher).
A GraphQL Subscription is simply a request from a client to be notified when a specific event occurs on a resource.
Here is how it works:
- You define and expose on your GraphQL API a list of subscriptions (events) that clients can subscribe to
- Clients invoke these subscriptions (like mutations) to register their interest in being notified when a specific event occurs
- When the event occurs, send a notification (websocket, webhook) to the client
Imagine the following mutation used to like a story on a social network:
For this mutation we could define the following subscription:
Upon subscribing to the "like" event for a given story our service would notify you based on who you are: websocket for frontend clients, webhook for backend clients.
To simplify the implementation in this article we will use Pusher as a message broker to notify clients via websockets. But remember that subscriptions do not have to be limited to websockets - the logic we present below can easily be extend to support webhooks as well.
In this episode I will be reusing the Book(name, page_size, user_id) and User(name, email) models we defined in the previous episode.
The event architecture
Let's think about the flow of events before we get into the actual implementation. There are two key concepts we want to flesh out: Subscribing and Notifying.
Subscribing involves the following steps:
- A GraphQL Subscription is defined on our API allowing clients to subscribe to a specific resource
- To keep things simple only update/delete events will be managed
- When a client subscribes we must check it is authorized to do so
- If authorized we will store a subscription entry in Redis
Notifying involves the following steps:
- Some ActiveRecord models are configured with subscription-specific callbacks on update and delete
- When a model is updated/deleted we check if any subscription is stored in Redis for that model
- For each subscription we send a notification to Pusher
Let's see how to implement the above for the Book model.
Step 1: Prepare the GraphQL controller
In order to attach subscriptions to a requesting users we will simulate an authentication mechanism with a current_user.
We hinted at how authentication context could be passed to GraphQL on part 1 but here is a refresher on how to do it inside the GraphqlController.
First let's define our current_user method in ApplicationController as we will need it in other controllers later on.
Important note: We disable CSRF protection for ease of testing only. I might do a separate article on how to setup CSRF with GraphQL. In the meantime I recommend this Stack Overflow answer for the main guidelines (use of cookie + header)
Then pass this current user to the GraphQL context so it can later be retrieved.
We also add some logic to return the Pusher subscription channel in the X-Subscription-Channel header if the request was for a subscription. This will ensure that JavaScript clients are aware of which channel to subscribe to.
With the above in place we have enough to get started on the core implementation.
Step 2: Register the subscriptions
GraphQL uses a declarative approach for subscriptions. All supported events must be listed in the app/graphql/types/subscription_type.rb file.
Let's add the "updated" and "deleted" events for the Book model:
Also make sure that your subscription file is used in your GraphQL schema configuration file:
Step 3: Add the subscription event handler
We have declared above that the subscriptions would be handled by the Subscriptions::BookModified class. Therefore let's define it.
The event handler class is responsible for authorizing the subscription at two levels:
- When the subscription is created: we check the user is allowed to subscribe to the object
- When an event is triggered: we check the user hasn't been revoked access since it registered
Here is what our book modified event handler looks like:
Not too complicated so far. Let's move on.
Step 4: Trigger the events
Now that users have the ability to register subscriptions, it's time for us to actually implement the triggers.
To do so we will add ActiveRecord callbacks to our Book model so as to trigger "book modified" events. This is what it looks like.
Take note of the parameters passed to the trigger method:
- Event name: it must match one of the events defined in the subscription type file (Step 2)
- Event scope: it must match the expected arguments of the handler class (Step 3)
- Payload: it must match the subscription response object so as to populate the event content with the fields initially requested (Step 3)
The event name and scope are the key parameters here as they allow a triggered event to be linked to a subscribing user. Users subscribe to event names with specific handler arguments - internal events mirror these parameters by triggering event names for a specific scope.
We now have the GraphQL Subscription skeleton for the subscription event lifecycle. We're now missing the actual notification middleware...and that's precisely what we're going to do next.
Step 5: Notification middleware
As mentioned previously we will use Pusher to notify clients via websockets. The graphql-ruby gem supports the use of middleware to handle specific aspects of its internal logic - and that's the case for subscription.
Let's start by configuring the Pusher gem.
Add the pusher-rb and redis gems to your Gemfile:
Then create an initializer with your Pusher configuration. You can get API keys by signing up for a free Pusher account - they have a generous free tier (200k messages per day and 100 concurrent connections).
Now let's create a graphql-compatible middleware to handle subscriptions. The middleware uses Redis to store and lookup subscriptions for specific users.
See the specific notes at the top of the class. The rest is really just about implementing the Subscription interface provided by graphql-ruby.
Finally, update the schema file and tell GraphQL to use your subscription middleware:
We now have the core logic in place:
- Book subscriptions can be registered
- Book events get triggered
- Notifications are delivered via Pusher
There are two last steps we need take, which are Pusher-specific:
- Authorizing clients when subscribing to private channels
- Cleaning up subscriptions when channels get vacated
Step 6: Channel authorization and cleanup (Pusher-specific)
To properly handle private channel authorization as well as subscription cleanup when clients disconnect from channels we need to implement a controller that Pusher can communicate with.
Add the Pusher routes to your routes.rb file:
Then add the following controller. This controller does the following:
The auth endpoint is used by the Pusher JavaScript client to obtain an authorization token to subscribe to a private channel.
The webhooks endpoint receives channel webhooks from Pusher. It configured to delete user subscriptions when an event channel is vacated (= JavaScript client disconnects)
In order to make Pusher webhooks fully functional you also need to enter the webhook URL via the Pusher UI.
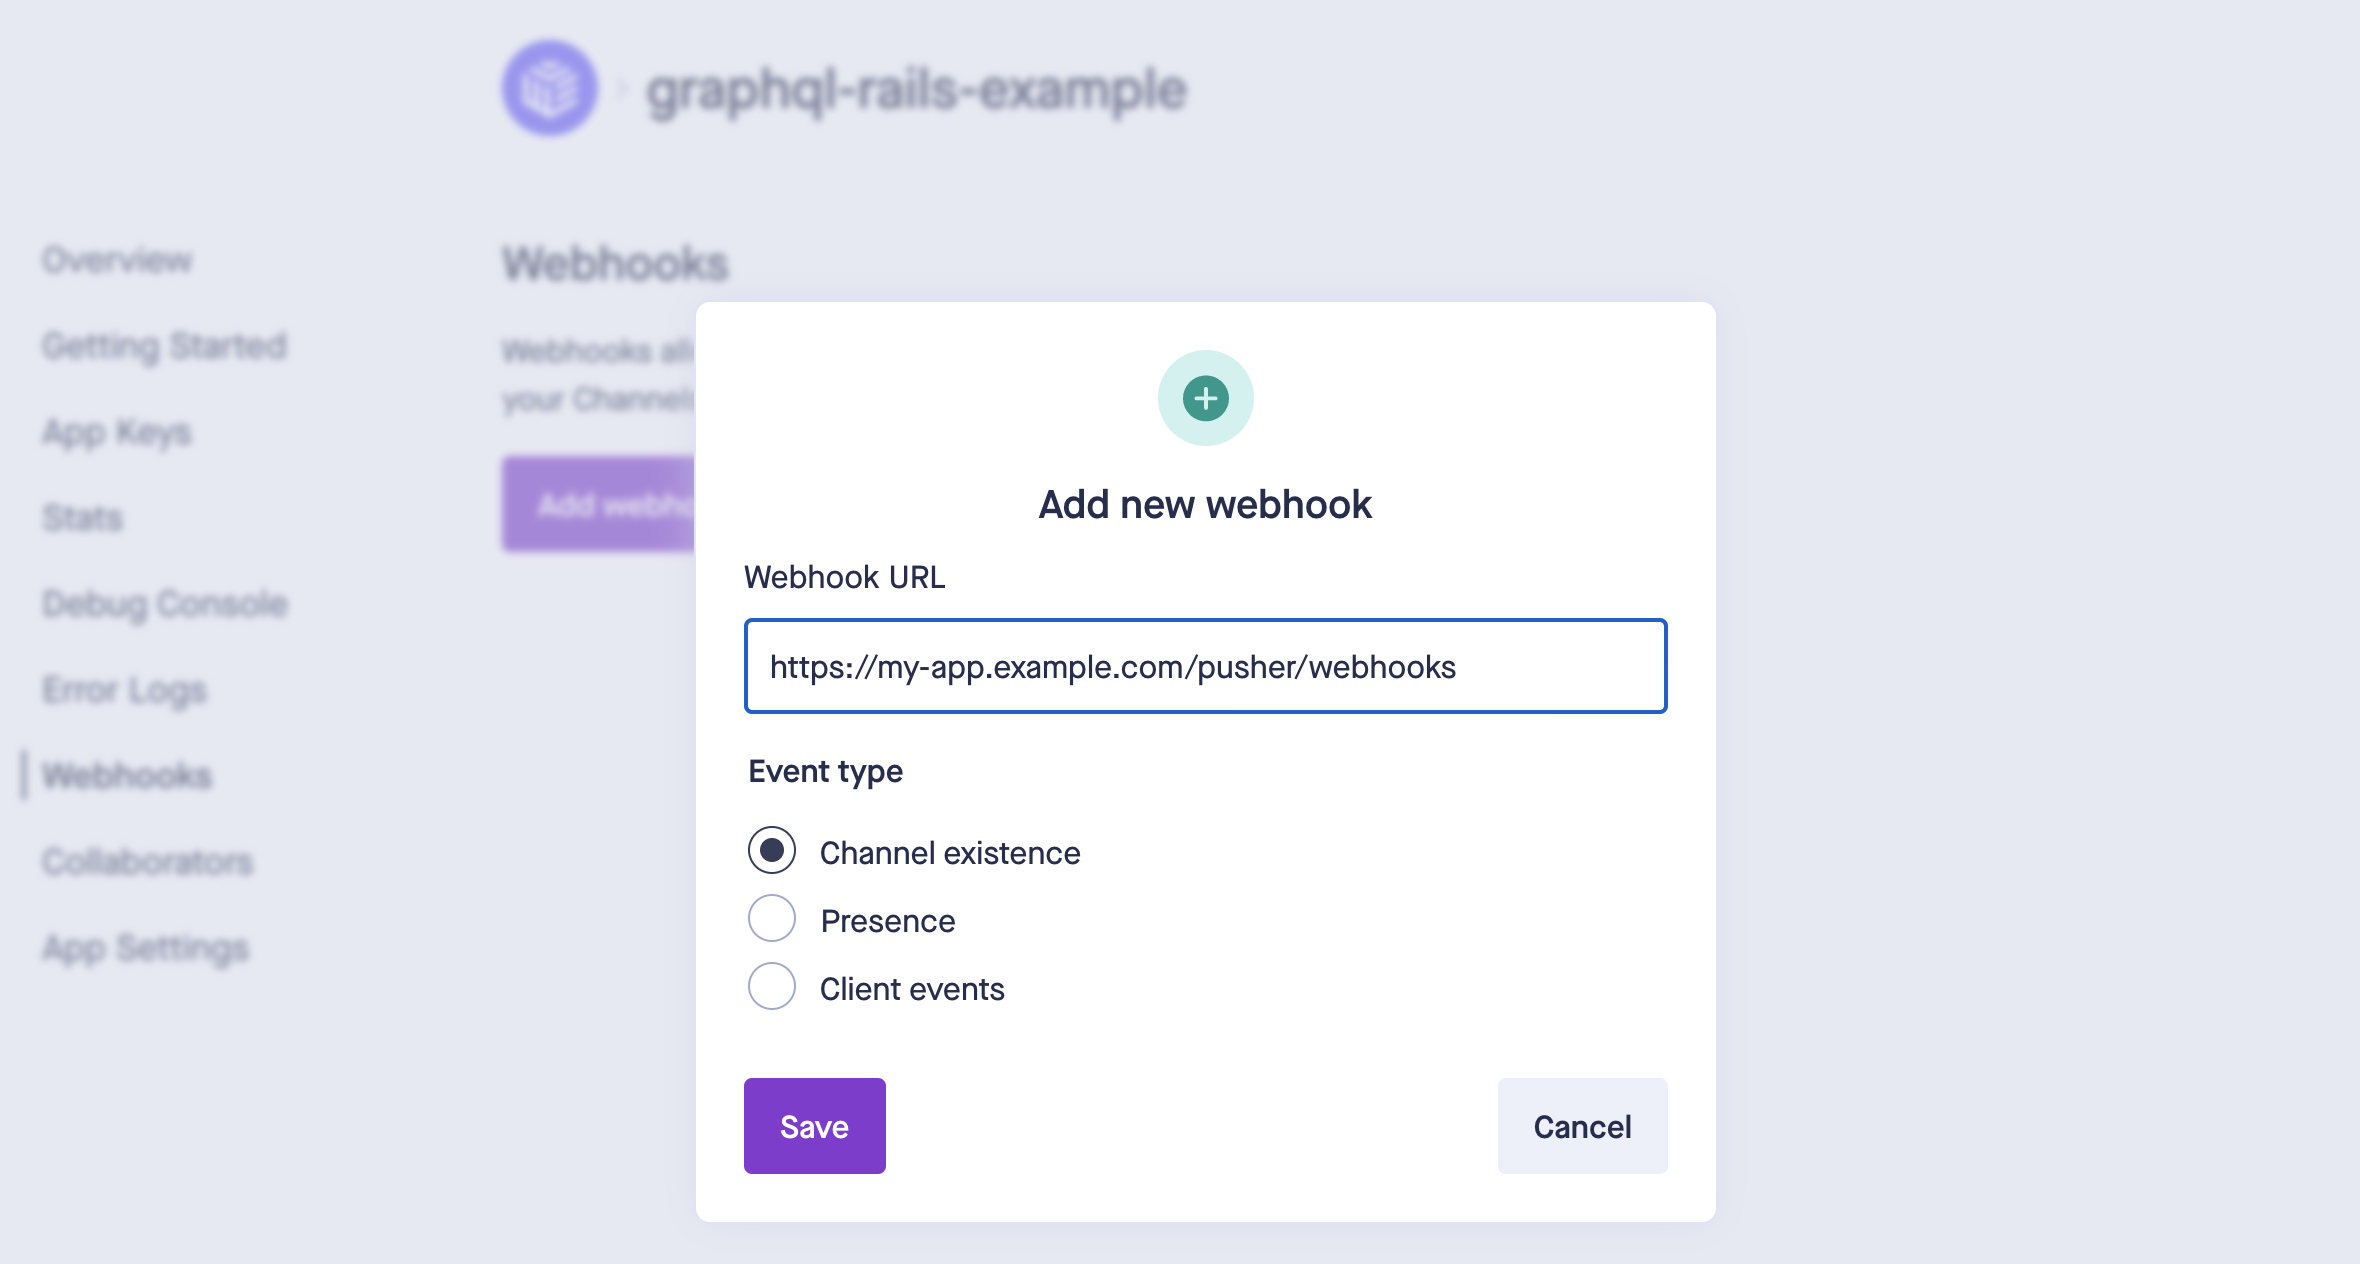
In development you can do this using an ngrok tunnel but this is really optional. Just keep it in mind when you end up deploying your app in production.
Step 7: Testing our subscription
To test our setup we want to add some JavaScript on our homepage that:
- Subscribes to updates for a specific book
- Inspects the X-Subscription-Channel HTTP header to retrieve the Pusher channel
- Subscribes to the Pusher channel
- Listens to updates
First, make sure you are database has test data. Launch a Rails console then create a user and a book:
For the demo page, we'll go simple-stupid and do it with a pure HTML page. Just drop this HTML page in your public folder and make sure to insert your Pusher key in there.
Time to test end to end:
- Launch your Rails server and access the home page
- Update the first book via the Rails console
The result should look like this:
🎉 Tada! 🎉
Wrapping up
Setting up GraphQL subscriptions may look daunting at first because they involve quite a few moving parts. But once the core logic is in place it is easy to extend it and make your application way more reactive (websockets, webhooks).
Here are few topics you can think about to go further (which I may write on in a follow up article):
- The callback/notification logic on the Book model could easily be made reusable via a module
- The BookModified subscription logic could certainly be made reusable as well, especially if you use Pundit for authorization.
- The scopes of subscriptions don't have to be as specific as an object ID. Scopes can be based on parent IDs. In our Book example we could allow users to subscribe to book events based on a user_id (author) and receive updates for all books attached to a user.
- The PusherMiddleware could be extended to support webhooks (see #each_subscription_id method). This could even be made based on the subscribing clients: use Pusher when the subscriber is a User and use webhooks when the subscriber is an ApiClient class.
There are lots of ways to go from there. Feel free to experiment and find a reactive approach that works for your application.
About us
Keypup's SaaS solution allows engineering teams and all software development stakeholders to gain a better understanding of their engineering efforts by combining real-time insights from their development and project management platforms. The solution integrates multiple data sources into a unified database along with a user-friendly dashboard and insights builder interface. Keypup users can customize tried-and-true templates or create their own reports, insights and dashboards to get a full picture of their development operations at a glance, tailored to their specific needs.
Code snippets hosted with ❤ by GitHub